Two Tomato Recipes

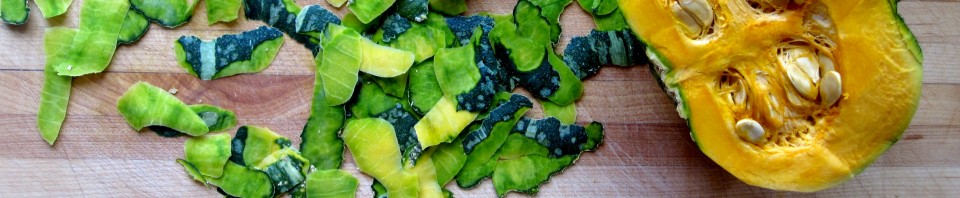
Tomato season is coming to a close, but there are still loads of tomatoes on my vines. Last week I went out and picked a huge bowlful of underripe tomatoes, leaving as much of the stem on as possible, and within 4 days they were perfectly ripe. If you pick all of your tomatoes before they are damaged by the first frost, chances are you can get most or all of them to ripen – even the fully green tomatoes! Lay them in a single layer in a box and keep them at room temperature. It’s even okay to keep them in the dark, for example in your basement, as long as it’s not below 50 degrees. Check them often and remove any tomatoes that show signs of rot – they should ripen in about 2 or 3 weeks.

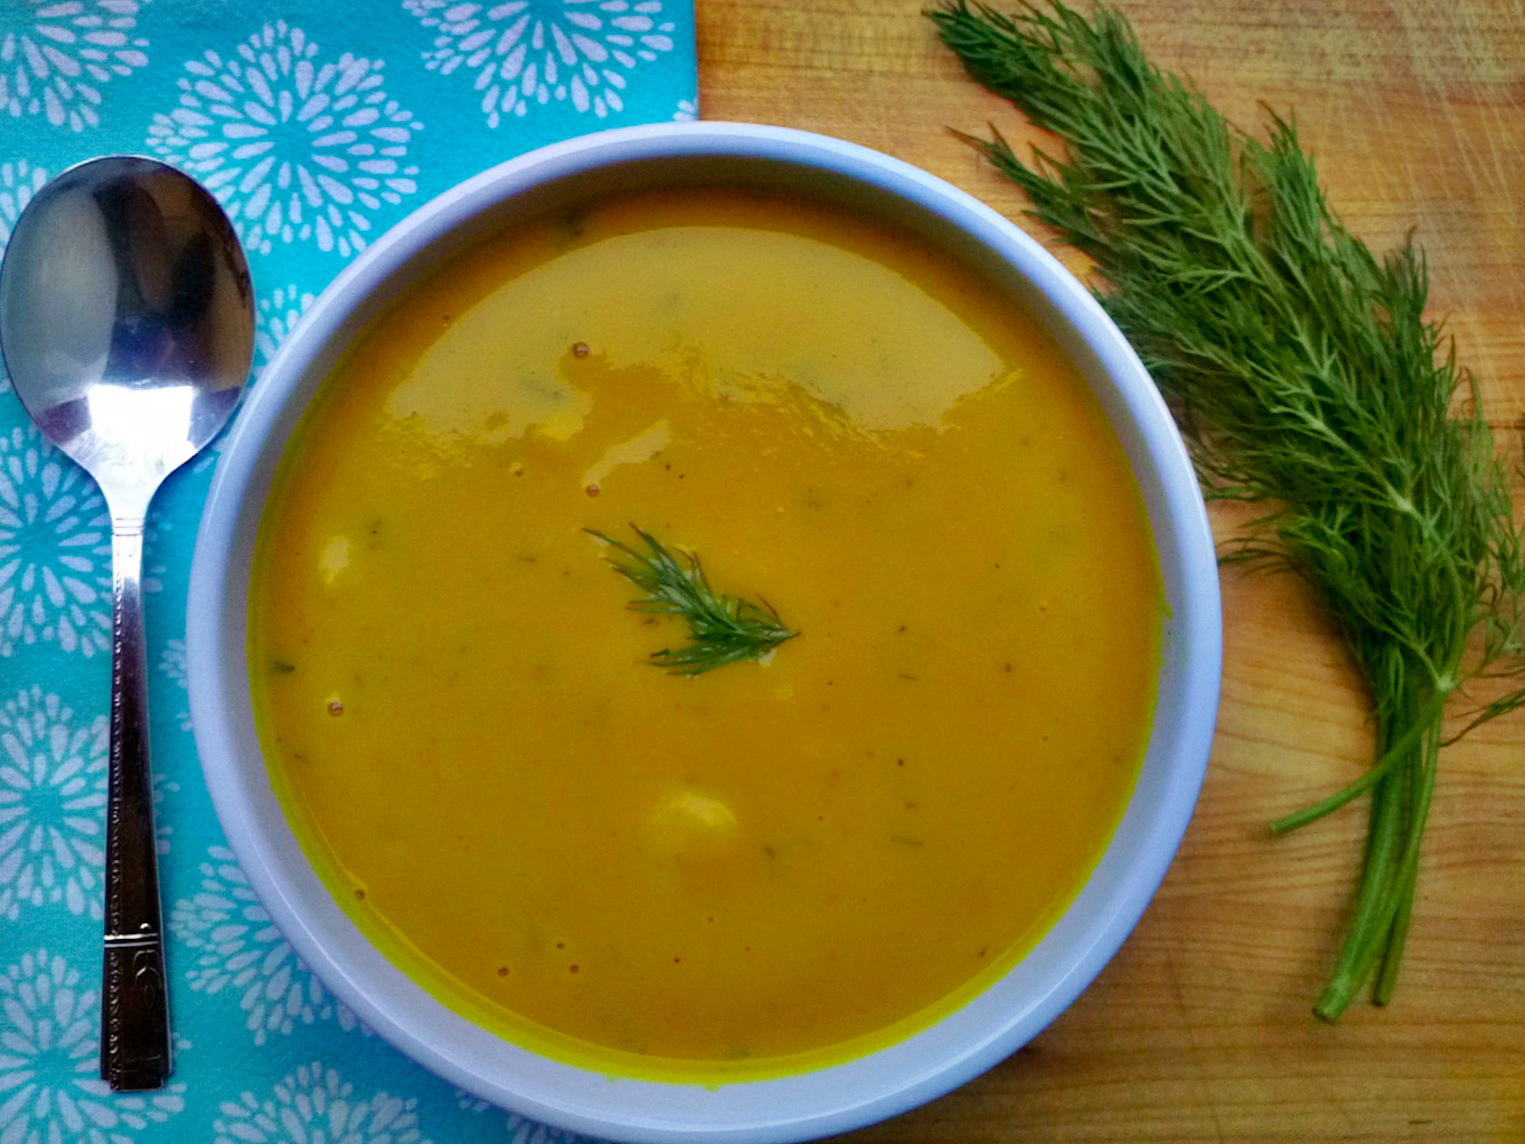
Here are two very simple ways I have preserved my tomato harvest from this year: A beautiful and creamy tomato-carrot sauce, which I made with mostly yellow pear tomatoes, and a rich tomato and shishito pepper soup with lots of basil. All three main soup ingredients were big producers in my garden this year, and even though it has started raining and cooled off considerably, my opal basil and shishito peppers are still looking great. Pacific Northwest gardeners – you should try growing these if you haven’t before!

Simple Tomato – Carrot Sauce
makes about 4 pints of sauce

3 tablespoons butter
1 medium onion, roughly chopped
2 large carrots, roughly chopped
6 whole cloves garlic, smashed
6 pints whole cherry tomatoes (or 12 cups other large tomatoes, roughly chopped)
1 cup of dry white wine
small handful of fresh oregano leaves
plenty of sea salt, to taste

tomatocarrotsauce

Melt butter in a large, heavy bottomed saucepan over medium heat. Saute onions, carrots, and garlic with plenty of salt for about 10 minutes. Add tomatoes, white wine, and oregano, cover, and increase heat to high. Bring to a boil, uncover, and reduce to a simmer. Simmer the sauce, stirring occasionally, for about 90 minutes or until reduced and thick. Allow to cool for 30 minutes and puree using a stick blender or regular blender. Transfer to jars, cool completely, and then freeze.

Simple light dinner or side dish for two- Warm one pint of sauce. Once lightly bubbling, add 3 ounces cream cheese or goat cheese and stir to melt. Serve over noodles of your choice.

Tomato and Blistered Pepper Soup with Basil
makes 3 quarts of soup

3 tablespoons olive oil
2 medium sweet onions, roughly chopped
10 cloves garlic, smashed
1 pint shishito or padron peppers, stems trimmed off
6 pints (12 cups) whole cherry or roughly chopped large tomatoes
1 cup dry white wine
5 cups water
plenty of salt and pepper, to taste
1 cup basil leaves, packed
1 cup heavy cream (optional)

tomatopeppersoup

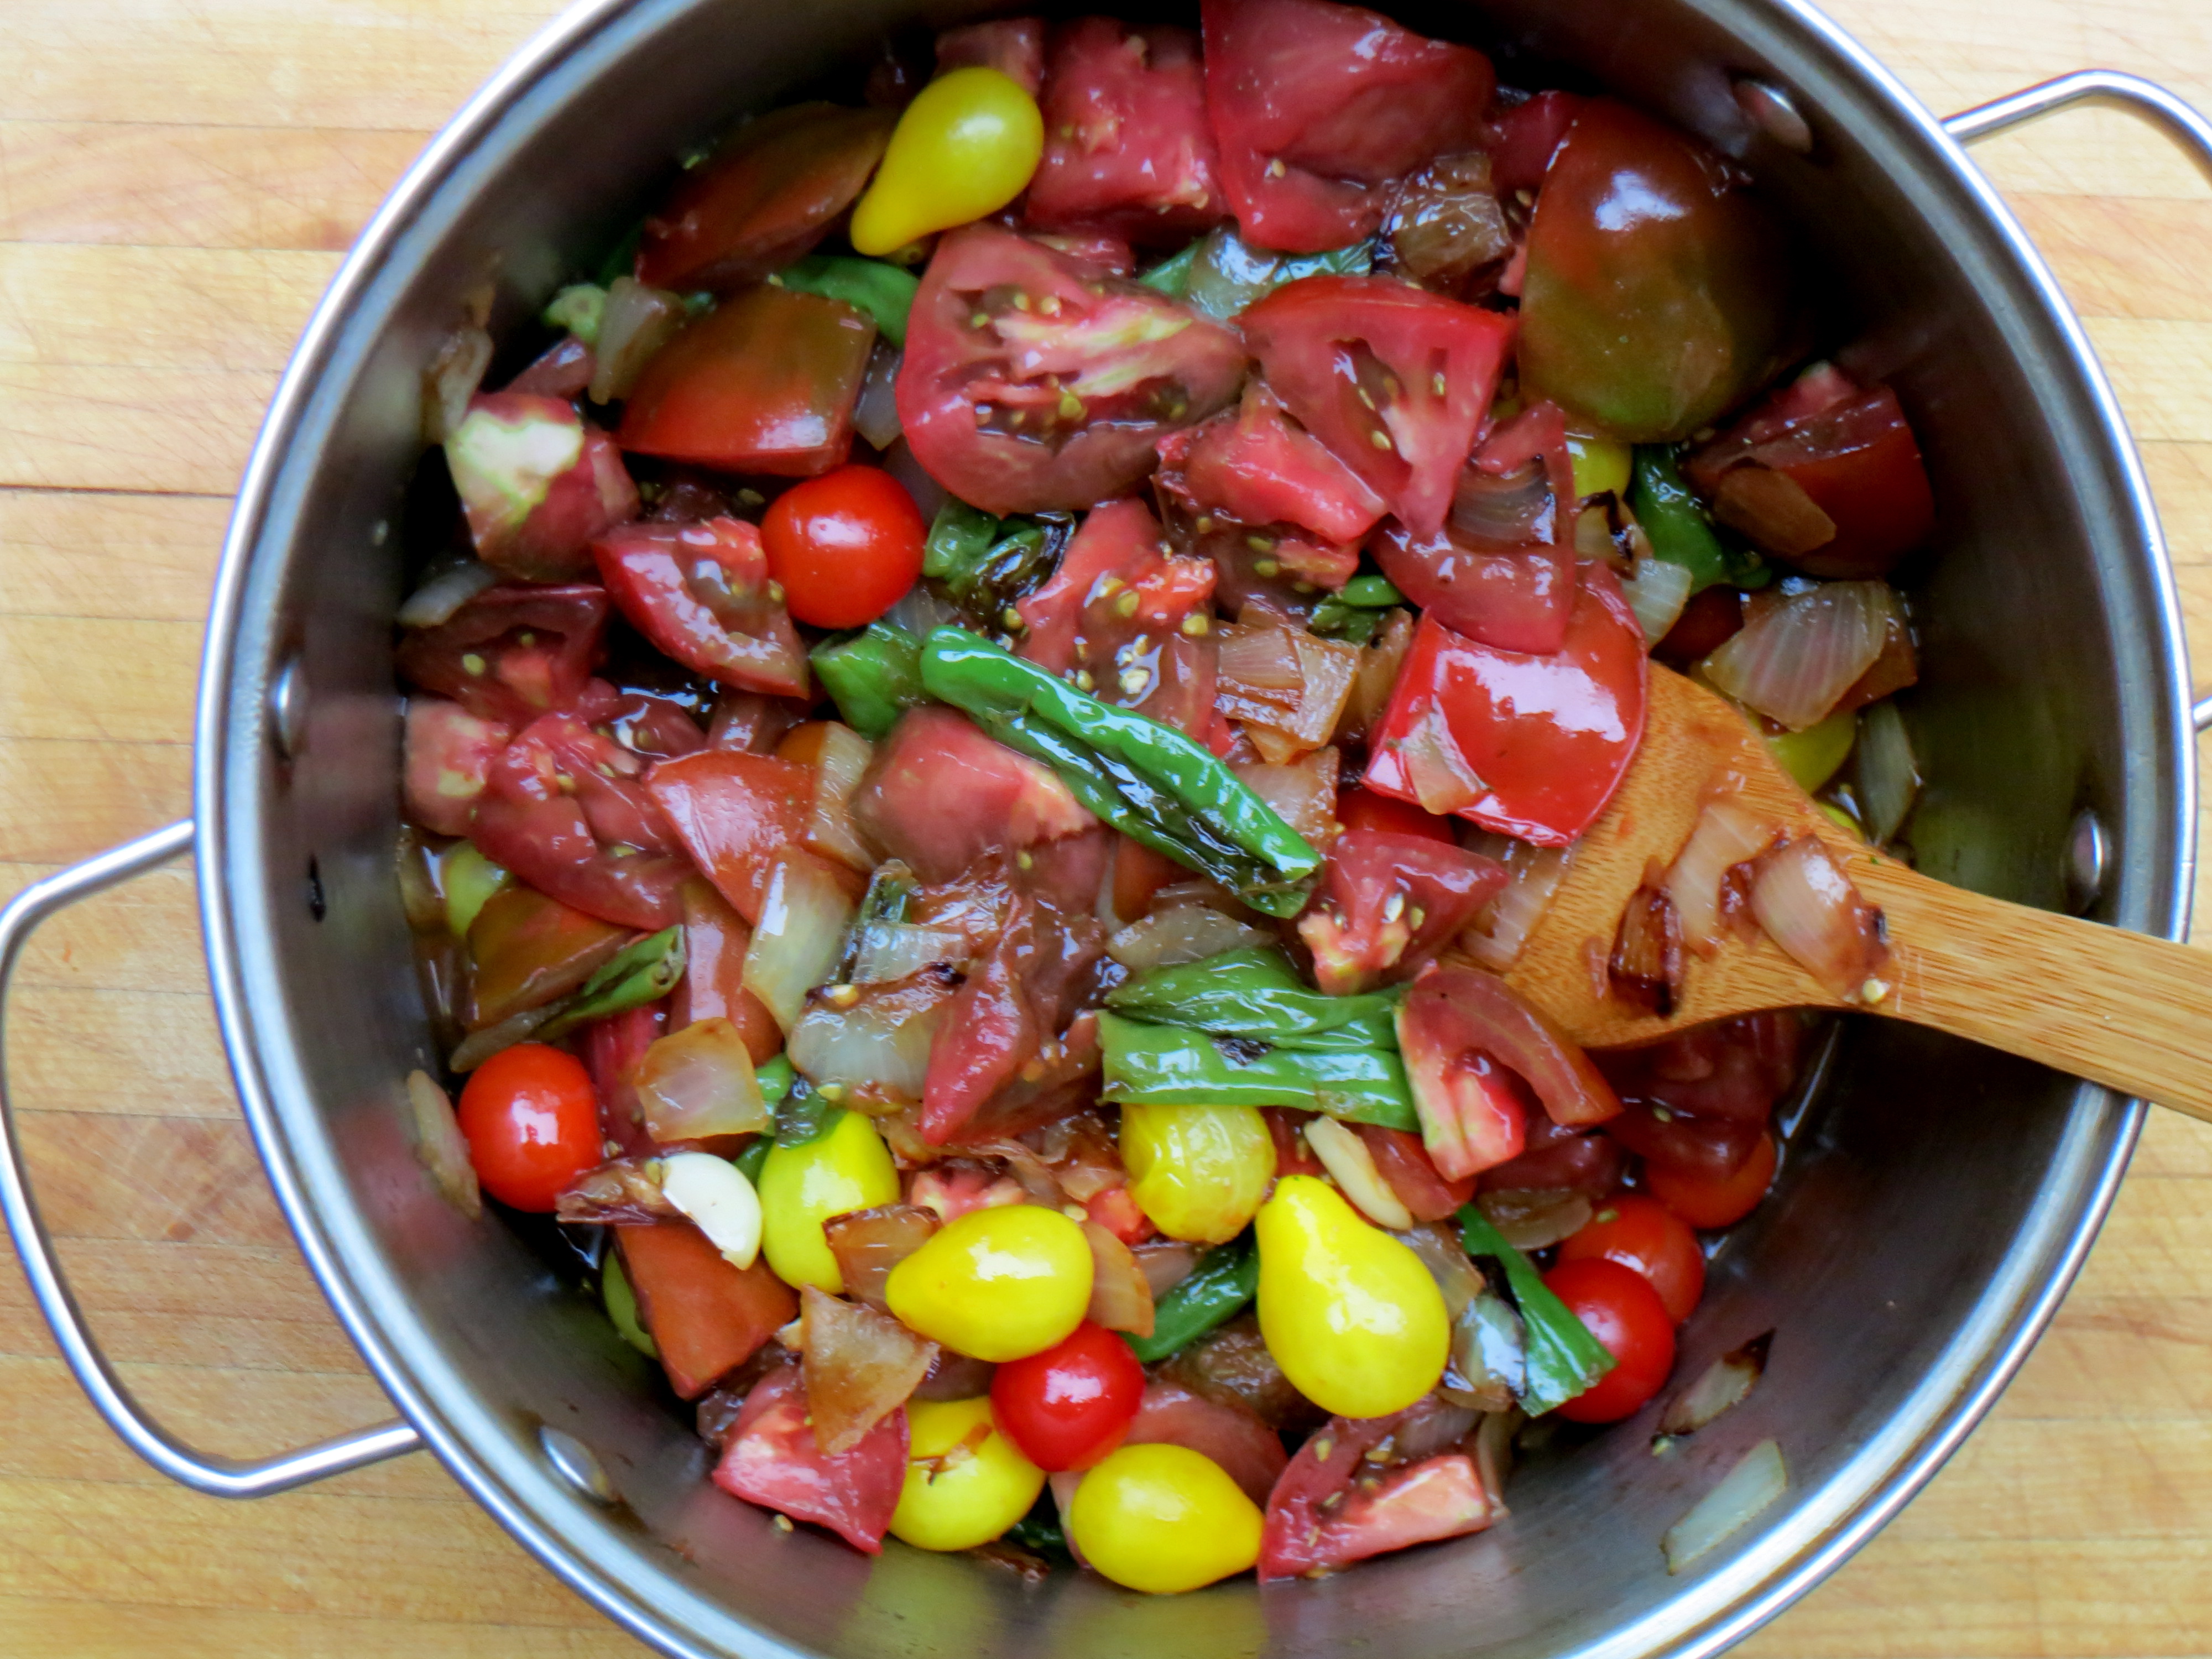
Warm a large saucepan over medium high heat. Add olive oil, onions, and garlic and cook, stirring often, until peppers begin to brown and blister, about 15 minutes. Add tomatoes, wine, water, and plenty of salt and pepper. Cover and bring to a boil, then uncover and reduce to a simmer. Cook the soup for about 30 minutes and allow to cool slightly. Add the basil and puree the soup with a stick blender or in a regular blender in batches. Chill until cold and then freeze until ready to use. For each quart of soup, rewarm and stir in 1/3 cup heavy cream and adjust salt before serving.

Posted in gardening, gluten free, paleo, perfect health diet, soup, vegetarian | Comments Off on Two Tomato Recipes

Kale & Pear Salad with Lime Yogurt Dressing

What?!? Another kale salad? Thaaaat’s right!! This version has an interesting sweet/salty component that makes it really unique – firm-ripe pears, salty cotija cheese, freeze-dried corn (I’m obsessed with this on salads right now), and pomegranate seeds. I couldn’t find fresh pomegranates this time of year, so I used freeze-dried. Fresh would definitely be better, but pick up some freeze-dried in a pinch.

This will be a great summer salad, especially of you’re growing loads of kale or frequent the farmer’s market. Keep the recipe around for winter, though, when you’re dying for an interesting salad (and pomegranates will be easy to find). And in case you’re new here, this kale salad is also delicious and this one is as well.

IMG_0540Pear_salad

Kale & Pear Salad with Lime Yogurt Dressing:

For the Dressing
¼ cup freshly squeezed lime juice
1 tablespoon honey
2 tablespoons plain yogurt
⅓ cup avocado oil
¼ teaspoon salt

Place all ingredients into a jar with a tight-fitting lid and shake vigorously.

For the salad
5 ounces baby kale
2 firm ripe pears, such as Green Bartlett, Red Anjou, or Green Anjou
⅓ cup freeze-dried corn
⅓ cup pumpkin seeds (without hulls)
⅓ cup crumbled cotija cheese
¼ cup pomegranate seeds

Set aside about half of the cotija cheese and the pomegranate seeds for garnish. Combine the remaining ingredients in a large bowl and toss gently with about 2/3 of the dressing. Reserve the remaining dressing for drizzling on the salad, if desired. Sprinkle the tossed salad with the crumbled cheese and the pomegranate seeds and serve.

Posted in gluten free, paleo, salad, vegetarian | Comments Off on Kale & Pear Salad with Lime Yogurt Dressing

Creamy Cauliflower Soup with Turmeric, Garlic, and Dill

I’ve been creating this soup in my mind for months – turning around different ingredients in my head over and over to try and imagine the perfect combination.

It all started when I picked up a nasty cold back in October. All I wanted to eat was basic, homemade chicken broth seasoned simply with garlic and sea salt, but I couldn’t find chicken backs (my most prized broth-making unit) to save my life!! I asked at farmer’s markets and meat counters all over town and all they could do was shrug and offer me drumsticks. Being grumpy and finicky (as one often is when their head is pounding and full of snot), I would hear none of it. No drumsticks for me, thank you! I’d prefer to wallow in self-pity, continuing to subsist on croissants and Thera Flu and wondering aloud why I feel so terrible.

By the time my cold finally left my body weeks later, I had envisioned what I imagine to be the most perfect, healing soup – a cold’s worst enemy. This soup is cauliflower-based, so it’s full of cruciferous vegetable-y goodness. It also uses generous quantities of onion, garlic, and turmeric, which are not only delicious, but full of potentially healing and anti-inflammatory compounds. Ideally this soup would be made with homemade chicken bone broth, but good boxed broth will do in a pinch. Finish this soup with brightly flavored fresh dill for even more healing power.

Camera 360

Creamy Cauliflower Soup with Turmeric, Garlic, and Dill
*serves 8*

3 Tbsp. ghee or butter
1 large sweet onion, chopped
2 large heads cauliflower, broken into florets (about 8 C. total)
3 large cloves garlic, sliced
1 Tbsp. tomato paste
1 Tbsp. PLUS 2 tsp. ground turmeric
2 tsp. ground mustard powder
1 bay leaf
6 C. chicken or vegetable stock, preferably homemade
½ C. heavy cream
3 Tbsp. fresh dill, chopped
S & P to taste

Heat the butter in a large, heavy bottomed pot over medium-low heat. Once the butter is hot, add the onion and all but three cups of the cauliflower and sauté until the onion is translucent and the cauliflower is softened, about 8 minutes. Add the garlic and cook for a few minutes more until very fragrant. Lastly, add the tomato paste, turmeric, and ground mustard, allowing the spices to toast and the tomato to caramelize for about 2 – 3 minutes, stirring often.

Camera 360

Once your spices are nicely toasted, add the bay leaf and all of the broth to the pot and stir to pick up any bits that have accumulated on the bottom of the pan. Increase the heat and bring the soup to a boil. Once boiling, reduce the heat to a simmer and cook the soup until the cauliflower is very tender, 15-20 minutes. Turn off the heat and allow the soup to cool slightly (stirring often will help).

Once the soup has cooled for 15-20 minutes, puree it in a blender in 2 or 3 batches until smooth. I recommend filling the blender no more than 2/3 of the way, holding a dishtowel tightly over the lid of the blender, and starting on the lowest speed when you puree anything hot.

Once all of the soup has been pureed, return it to the same pot and place it over low heat. Break or chop your remaining 3 cups of cauliflower into small, bite-sized pieces and return to the pot. Cover the pot and cook the soup over low heat until the added cauliflower is soft, about 15-20 minutes.

Camera 360

Once the cauliflower is cooked to your liking, remove the soup from the heat, and stir in the cream and fresh dill. Season the soup to taste with plenty of salt and pepper and serve immediately.

Posted in gluten free, perfect health diet, soup, vegetarian | Tagged , , | Comments Off on Creamy Cauliflower Soup with Turmeric, Garlic, and Dill

Pear, Fennel, Red Onion, and Butternut Squash Gratin

WOW, it has been a long time since my last recipe for the blog. This summer, life took a quick turn and decided to roll along at a pace a lot closer to whitewater than my preferred speed, lollygaggin’. Mr. Tummyrumblr and I started looking at houses to buy out here in Portland, assuming that it would take us a year or more to find a spot (that seems to be how it works around these parts), however, fate intervened, and six weeks later we were signing loan documents and renting a moving truck. Long story short, I’m back (and you’re back – thank you), and I’m looking forward to posting with much more frequency.

In addition to the move, another summer highlight was an offer from USA Pears to write several recipes to help bring excitement to the 2013 pear harvest. I was thrilled with the opportunity, not only because pears are such an integral part of Pacific Northwest cuisine, but because I’ve been wanting to get into professional recipe writing outside of my own blog. Creating delicious recipes with a new and exciting combinations of ingredients is one of the most fulfilling things about my line of work.

So without further ado, here is my latest pear-related recipe: A gorgeous, multicolor, fall-inspired gratin that will make a perfect side dish for any holiday gathering.

IMG_0087

Pear, Fennel, Red Onion, and Butternut Squash Gratin
*serves 8-10*

2 medium red onions, peeled and sliced into ¼” rings
2 medium fennel bulbs (green tops removed), sliced into ¼” slices right through the core
2 Tablespoons olive oil
Salt & freshly ground pepper
1 Tablespoon butter
1 medium butternut squash with a long neck
2 large, red USA Pears, such as Red Bartlett or Starkrimson
1 ⅔ cups. heavy cream
2 pinches ground nutmeg
4 ounces vintage white cheddar, grated

Preheat the oven to 375 degrees. Lay the onion and fennel slices out onto a sheet pan in a single layer. Drizzle with the olive oil and season generously with salt and pepper, turning the slices over to coat both sides. Bake at 375 for 25 minutes or until the vegetables are just tender, and then set them aside to cool. Increase the oven temperature to 400 degrees.

IMG_0050

Grease a glass or ceramic 12 inch pie dish or 9 x 13 baking dish with the butter and set aside. Peel the skin from the neck of the butternut squash. Starting from the stem end, slice the squash into ⅛” slices until you have 20-24 slices. Reserve the base of the squash for use in a soup or stew. Slice the pear into slightly thicker ¼” slices, cutting around the core. Set both the squash and pear slices aside.

IMG_0058

Place the cream, nutmeg, a generous pinch of salt, and several more turns of pepper into a heavy-bottomed saucepan over medium heat and warm until just simmering. In the meantime, begin layering your squash and pear slices in your baking dish. Alternate the disks of squash with the largest pear slices. Use the smaller pear pieces to fill in any gaps, and cut down some of the squash slices if necessary. Next, top the pear and squash with the fennel, spreading it around evenly. Top the fennel with the red onion in an attractive pattern. Lastly, pour the hot cream mixture over the top of the layered vegetables, being sure to get it into every nook and cranny. The cream mixture will only come up the sides of the vegetables about half way.

IMG_0077

Cover the gratin tightly with foil and place onto a baking sheet to prevent spillage. Slide into the 400 degree oven and bake for 60-75 minutes, or until the squash slices are fork tender. Once they are soft, remove the foil and sprinkle the grated cheese over the top of the gratin. Return it to the oven for 15 minutes, or until the cheese is bubbly and beginning to brown.

Allow the gratin to cool for at least 20 minutes before serving.

Posted in gluten free, perfect health diet, vegetarian | Tagged , , , | Comments Off on Pear, Fennel, Red Onion, and Butternut Squash Gratin

Braised Red Cabbage

This sweet and tangy braised cabbage has become a favorite recipe at our house. I don’t think I would have ever thought to make cooked cabbage if it wasn’t for my dear friend Katrina. Her mother was German and Katrina learned to love this dish growing up. She came to visit me when I lived in Chicago one year at Thanksgiving and made this for a side dish. I was so impressed with it – it really is a perfect side dish for a rich dinner of roasted meat. It’s got some sweetness from the caramelization of the onions and the cabbage, and it has this wonderful tartness from the vinegar. These days we often use it as a side dish when we eat our weekly dose of beef liver. It really cuts the sometimes too-rich flavor of the liver (at least for me – my husband could eat the stuff with just a little salt and pepper).

Katrina makes her version with an apple, and it’s perfect.  Today I made mine with cherries just because they happen to be in season. I think it would also be great with dried fruit – apricots or figs in particular.

Braised Red Cabbage

Braised Red Cabbage
*makes 6-8 servings*

3 Tbsp. ghee, butter, or lard
1 medium sweet onion, thinly sliced
1 small head red cabbage, quartered, cored, and cut into large chunks
1/2 C. dry white wine
12 cherries, halved and pitted, or 1 medium tart apple, diced
3 sprigs fresh thyme
1-2 Tbsp. sherry vinegar
S & P

Warm a large, heavy-bottomed pot over medium heat (cast iron is great). Melt the fat in the pot and add the onions, seasoning them with plenty of salt and pepper. Sauté the onions, stirring often, until just starting to brown, about 5 minutes.

Add the chopped cabbage, breaking apart as you go, along with the apple or cherries. Stir well to coat the cabbage with the fat.

Lastly, add the thyme sprigs, wine, and vinegar. Cover and reduce the heat to medium low. Allow the cabbage to cook for 50-60 minutes, stirring every 10 minutes or so to prevent sticking. You will likely have to reduce the heat further once most of the liquid evaporates.

The cabbage will be a deep, rich color and meltingly tender when it is ready. Add more vinegar and salt to taste if necessary and remove the thyme stems before serving.


Posted in gluten free, paleo, perfect health diet, vegetarian | Tagged , , , | Comments Off on Braised Red Cabbage

Dinner on a Stick

Our short-term summer weather has been put on hold here in Portland in favor of more seasonal 60 degrees days (with a light drizzle, of course). But it hasn’t stopped me from continuing to use the grill. Today I’m offering two simple recipes for the BBQ that make for a complete meal together and won’t require turning on the oven: Grilled Caprese Salad and Chicken and Salami Skewers.

The idea for putting salami on a skewer came from my brother, who ingeniously thought it up while we were skewering up vegetables while snacking on salami slices the other night. I love the way the edges of the salami crisp up on the BBQ. Dare I say grilled salami gives bacon a run for its money?

The grilled caprese idea was born out of my extreme excitement for tomato season.  Unfortunately, the tomatoes one can get their hands on this time of year bear little resemblance to late summer tomatoes, so I thought I’d give these bland little cherries a boost by lightly caramelizing them on the grill. The heat makes them pop open and creates its own lovely roasted tomato vinaigrette dressing for the salad (with a little help from some good salt and olive oil).

I haven’t listed amounts for these recipes because it’s a little difficult for skewers. As usual, I suggest you just go with your gut based on the number you’re feeding and your preferences. We had several chicken and salami skewers left over and they were delicious cold. I’m betting any leftover caprese would be nice the next day as well.

Salami Skewers

Grilled Caprese Salad:

Small Zucchini, sliced into 1/2″ discs
Cherry Tomatoes, any color or shape
Fresh Basil Leaves
Ciliegine (bite-sized fresh mozzerella balls)
Olive Oil
Sea Salt

Preheat your grill to a moderate heat. Skewer up the zucchini pieces and the cherry tomatoes – assume two 12″ skewers per person. Drizzle the vegetables lightly with olive oil and season with sea salt. Grill for 3 or 4 minutes per side, or until the tomatoes are just starting to brown and blister. Set aside until cool enough to handle.

Once slightly cooled, gently slide the zucchini and tomatoes from their skewers and into an appropriately-sized bowl. Add the well drained mozzarella balls along with plenty of basil leaves. Drizzle with more olive oil and a good sprinkling of salt. Toss gently to combine and serve immediately.

Grilled Caprese Salad

Chicken and Salami Skewers:

Chicken Breast, cut into bite-sized pieces and marinated in 2 parts lemon, 1 part olive oil, and plenty of sea salt
Thinly Sliced Salami, folded into quarters
Mushrooms
Red Bell Peppers, cut into bite-sized pieces
Fennel, cut into bite-sized pieces
Anything else that sounds good to you

Marinate the chicken breast at least an hour in advance or up to one day (see ratios above).

When you’re ready to make the skewers, preheat the grill to medium heat. Assemble the skewers with your desired quantities of vegetables, meat, and salami. Drizzle lightly with olive oil and sprinkle with a little sea salt. Grill for approximately 5 minutes per side (assuming 2 sides) and then test for doneness. The salami should be crispy on the edges and the chicken pieces should be just cooked through. Serve the skewers immediately alongside the caprese salad.

Salami Skewers


Posted in gluten free, paleo, perfect health diet, salad, vegetarian | Tagged , , , , | Comments Off on Dinner on a Stick